A Beginner’s Guide to Desktop Fabrication
There is a specific kind of magic that happens the first time you watch a 3D printer in action. It starts with a hum and a mechanical dance as a heated nozzle traces a thin line of plastic onto a platform. Slowly, almost imperceptibly, a physical object begins to emerge from nothing. It is the moment many hobbyists describe as the “click”—the realization that you are no longer just someone who buys things, but someone who manufactures them.
For years, this technology was locked behind a wall of high costs and steep learning curves. You needed a degree in mechanical engineering and a massive budget just to get a machine to move. But as we move through 2026, those barriers have effectively vanished. Desktop fabrication has become a “plug-and-play” experience accessible to anyone with a bit of curiosity and a spare corner of a desk.
If you have been sitting on the sidelines, wondering if now is the time to jump in, this guide will walk you through the essentials of starting your journey into the world of making.
Understanding the “Why” and the “How”
Before you buy a single spool of plastic, it is helpful to understand the basic mechanics. Most consumer-grade machines use a process called Fused Deposition Modeling (FDM). Think of it like a very precise, computer-controlled hot glue gun. The machine melts a thin strand of plastic (filament) and extrudes it through a tiny nozzle, building your object one microscopic layer at a time from the bottom up.
Why does this matter? Because unlike traditional manufacturing, which requires expensive molds or carving away material, 3D printing is “additive.” It allows you to create complex, hollow, and intricate shapes that would be physically impossible to make any other way. Whether you want to fix a broken kitchen appliance, create custom tabletop gaming miniatures, or design unique jewelry, the machine provides the versatility to do it all.
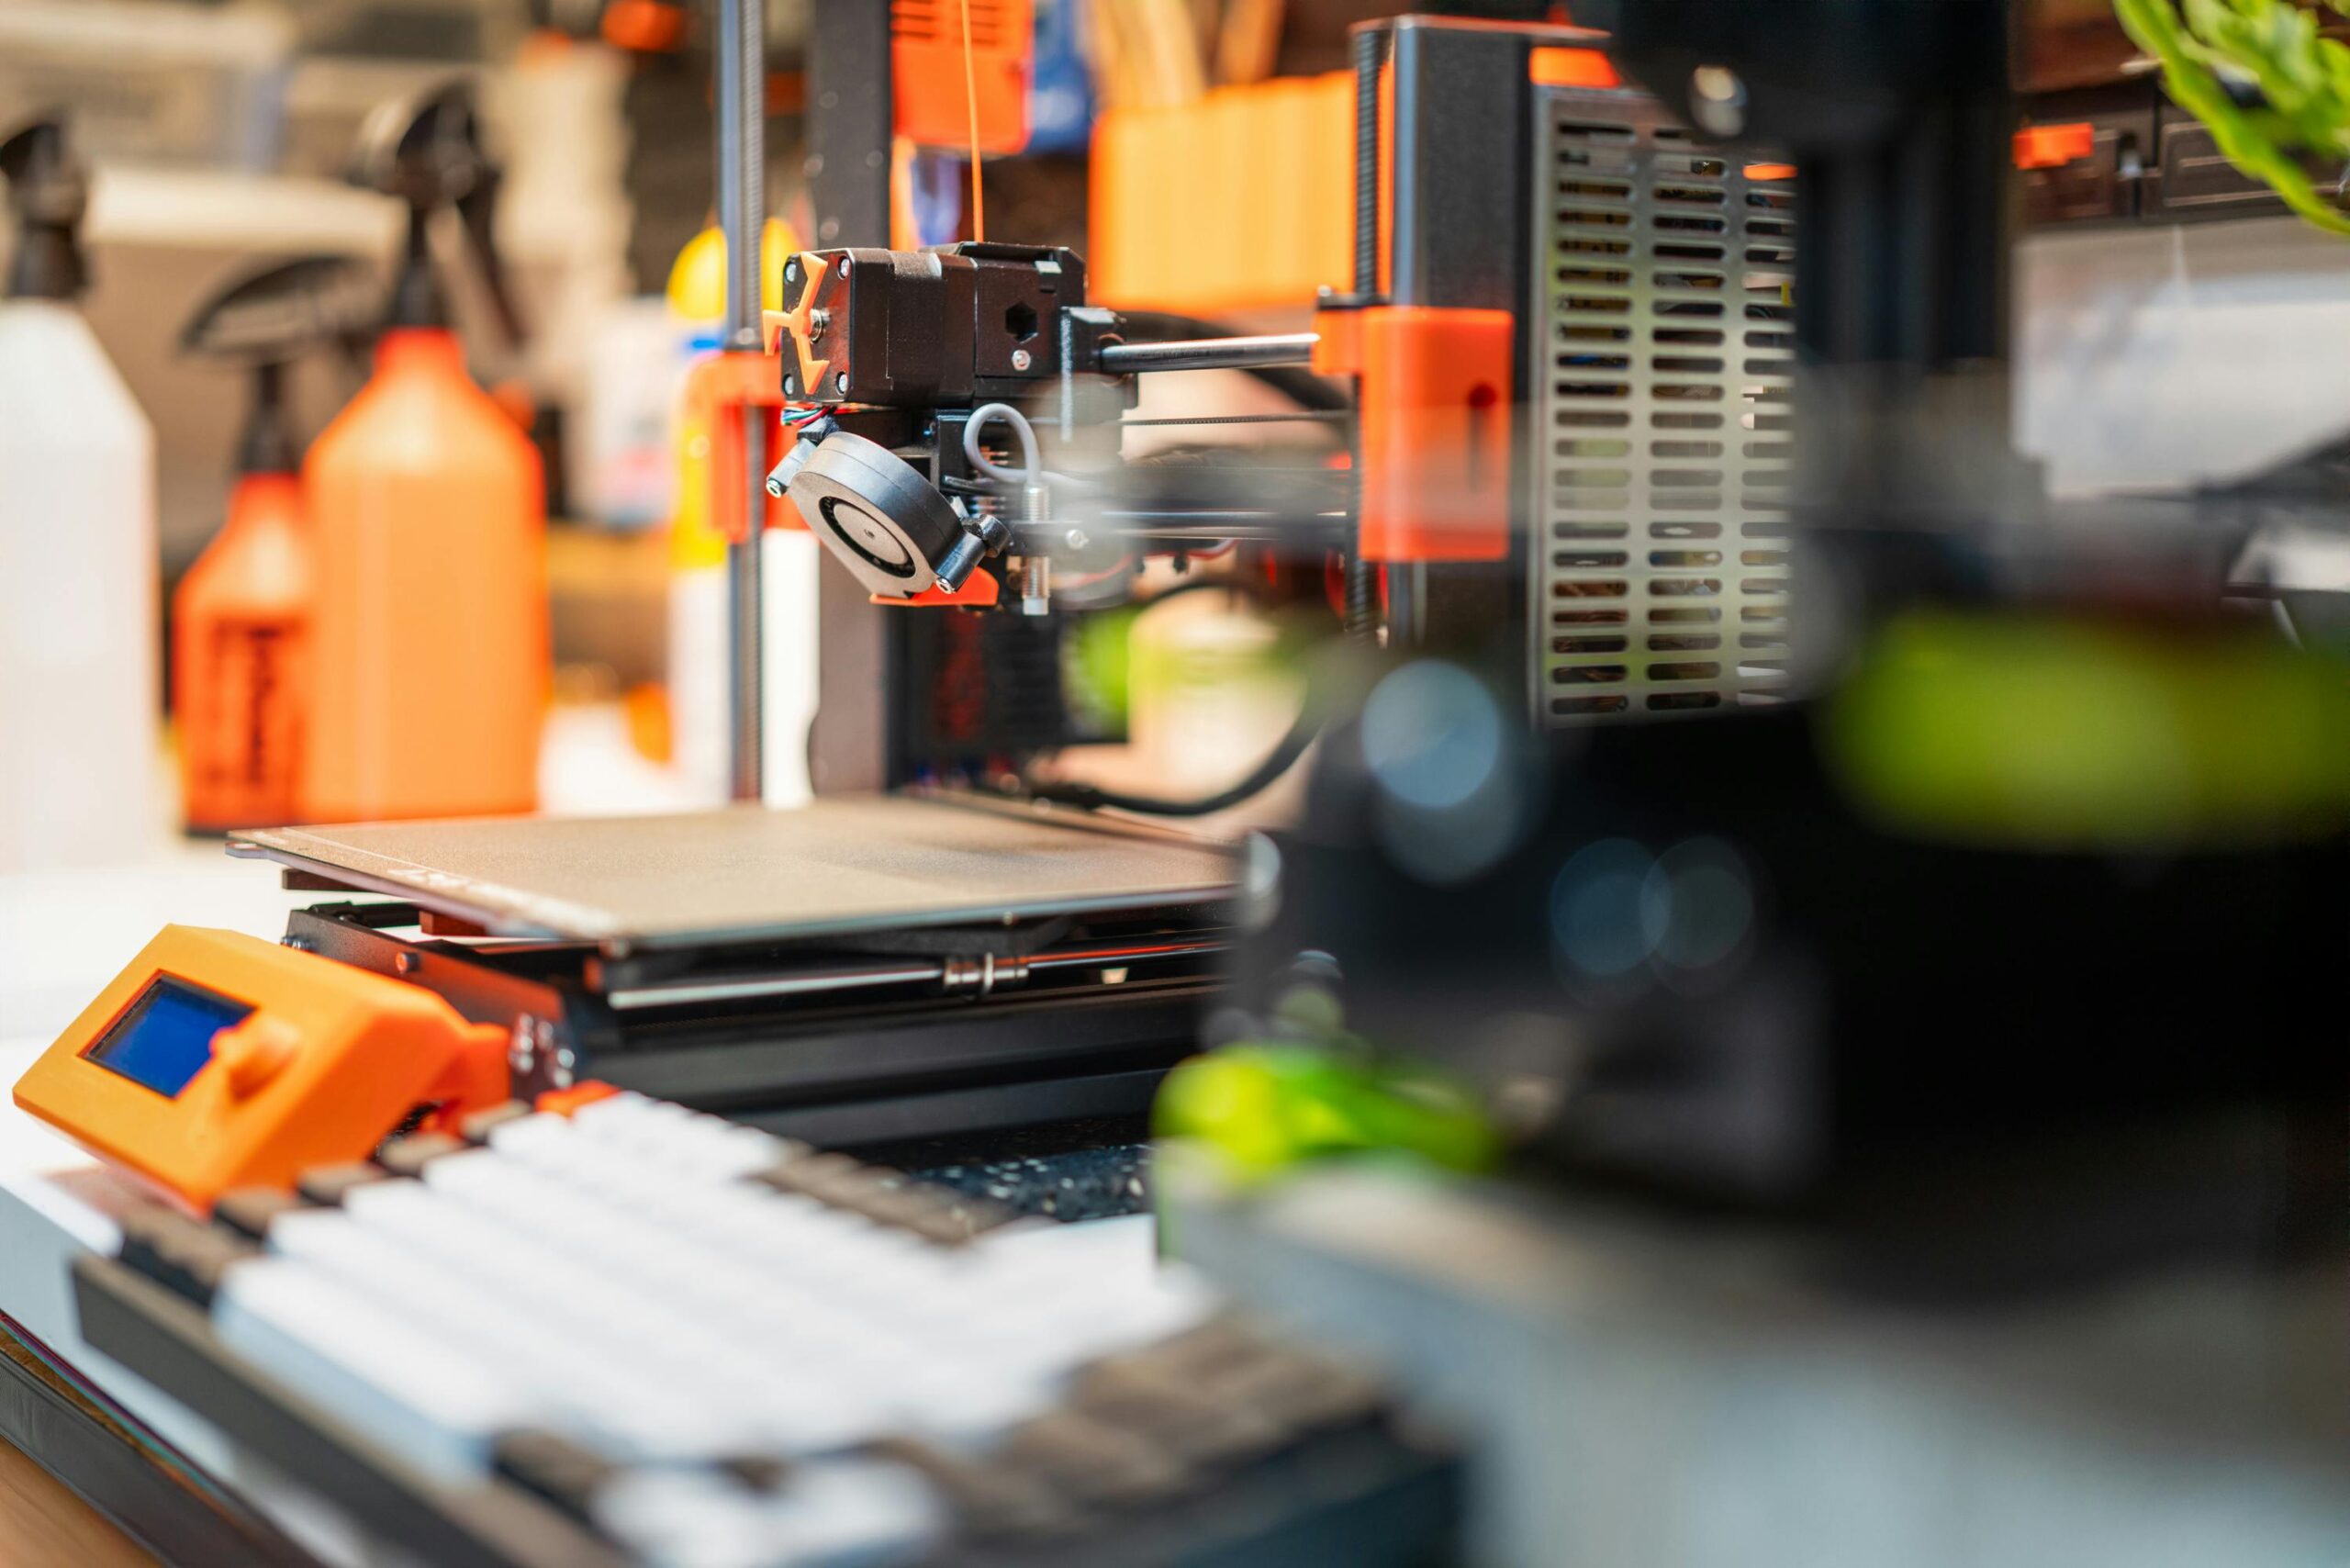
Selecting Your First Machine
The most daunting part for any beginner is choosing the hardware. The market is flooded with options, but you should prioritize three things: reliability, community support, and ease of assembly.
When you are first starting out, you want a 3d printer that offers a “set it and forget it” experience. Modern machines now feature “auto-bed leveling,” which uses sensors to ensure the first layer of your print is perfect every time—a task that used to take beginners hours of frustrating manual calibration.
You should also consider your long-term goals. While many beginners start with basic monochromatic prints, the trend in the hobby is moving toward more vibrant, multi-material creations. Investing in a color 3d printer from the start can save you the hassle of upgrading later. Having the ability to switch colors automatically allows you to create finished products that look professionally manufactured right off the build plate, without the need for messy sanding and painting.
The Digital Side: Slicing and Modeling
Once you have your machine, you need to give it instructions. This involves two types of software:
- 3D Modeling Software: This is where you design the object. For beginners, tools like Tinkercad are fantastic because they use simple “building block” logic. As you get more advanced, you might move into parametric design tools like Fusion 360 or organic sculpting tools like Blender.
- The Slicer: A printer doesn’t “read” a 3D file directly. It needs a “Slicer”—a program that takes your 3D model and cuts it into thousands of horizontal layers, generating a “G-code” file. This file tells the printer exactly where to move, how fast to go, and what temperature to maintain. Most modern printers come with their own optimized slicing software that makes this as easy as clicking a “Print” button.
Don’t worry if you aren’t a designer yet. The maker community is incredibly generous. Sites like Printables and Thingiverse host millions of free, pre-designed files that you can download and print immediately.
Materials 101: Start with PLA
While there are dozens of exotic materials—ranging from flexible rubbers to carbon-fiber-infused nylons—every beginner should start with PLA (Polylactic Acid).
PLA is the “gold standard” for newcomers for three reasons:
- Ease of Use: It prints at relatively low temperatures and doesn’t require a specialized heated enclosure to prevent warping.
- Safety: It is a bio-plastic derived from corn starch or sugarcane, meaning it doesn’t produce the harsh chemical odors associated with industrial plastics.
- Affordability: It is one of the most cost-effective materials, allowing you to experiment and learn without worrying about the cost of a “failed” print.
Embracing the Learning Curve
Here is the most important piece of advice for any new maker: Expect to fail, and enjoy it.
At some point, a print will come loose from the bed. A nozzle might get a partial clog. A design might not fit together exactly how you envisioned. In the maker world, these aren’t “failures”—they are calibration steps. Each time something goes wrong, you learn a little bit more about the physics of the machine and the properties of the material.
The 3D printing community is one of the most helpful groups on the internet. If you hit a snag, there is almost certainly a forum, a Discord server, or a YouTube tutorial where someone has solved that exact problem before.
The First “Real” Project
Your first few prints will likely be “calibration cats” or “Benchy” boats—standard test models used to check the machine’s accuracy. But the real joy begins when you solve a problem in your own home.
Maybe it’s a custom wall mount for your headphones, a specifically sized organizer for your junk drawer, or a replacement knob for a vintage radio. The moment you take a measurement in the real world, translate it into a digital file, and hold the physical solution in your hand a few hours later, you are no longer just a hobbyist. You are an inventor.
Welcome to the future of making. It’s going to be a vibrant journey.